
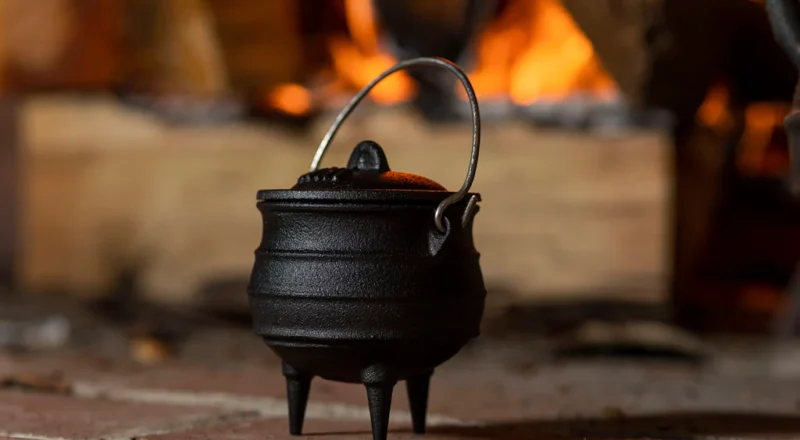
Antique cast iron cookware holds a special place in kitchens and collections around the world. These time-honored pieces are valued for their durability, unique patina, and the stories they carry from generations past. However, years of neglect, rust, or improper storage can leave these vessels in less-than-ideal condition. Fortunately, with the right approach, restoring antique cast iron vessels is not only possible but also deeply rewarding. This article will walk you through the essential steps to bring vintage cast iron back to life, ensuring it remains a functional and beautiful part of your home or collection.
Whether you’ve inherited a family heirloom, discovered a treasure at a flea market, or are passionate about traditional cookware, learning how to properly clean, repair, and season old cast iron is key. Along the way, you’ll gain a deeper appreciation for the craftsmanship and history behind these remarkable objects. For those interested in the broader context of traditional cookware, you might enjoy exploring metal casting history to see how these vessels fit into the evolution of kitchen tools.
Why Vintage Cast Iron Deserves Restoration
Old cast iron cookware is more than just a cooking tool—it’s a piece of history. Many antique pots, pans, and kettles were hand-poured and finished, resulting in unique characteristics that modern mass-produced cookware can’t replicate. Restoring these items preserves not only their function but also their historical and sentimental value.
Properly restored cast iron can last for centuries, offering non-stick performance and even heat distribution. Additionally, using and caring for these vessels connects us to historic food serving methods and culinary traditions from around the world.
Assessing the Condition of Your Antique Cast Iron
Before beginning the restoration process, it’s important to evaluate the condition of your cookware. Look for the following:
- Rust: Surface rust is common and usually manageable, but deep pitting may affect usability.
- Cracks and Warping: Hairline cracks or significant warping can compromise the vessel’s integrity. Minor imperfections are often cosmetic, but large cracks may make restoration impractical.
- Build-up: Layers of old seasoning, carbon, or grime can be removed, but check for signs of structural damage underneath.
If the piece is structurally sound, you can proceed with confidence. Otherwise, consider displaying it as a decorative item or seeking professional advice for complex repairs.
Essential Tools and Materials for Restoration
Gathering the right supplies will make the restoration process smoother and more effective. Here’s what you’ll need:
- Stiff-bristled brush or steel wool
- Fine-grade sandpaper (optional for stubborn spots)
- White vinegar
- Baking soda
- Dish soap (mild, unscented)
- Lint-free cloths or paper towels
- Vegetable oil, flaxseed oil, or a dedicated cast iron seasoning product
- Oven or outdoor grill for seasoning
- Protective gloves
For a convenient solution, consider using a specialized care kit. After the next in-post image, you’ll find a direct link to a highly rated option.
Step 1: Removing Rust and Old Seasoning
The first step in restoring antique cast iron vessels is to strip away rust and any built-up residue. Here’s how to do it safely:
- Soak in Vinegar Solution: Mix equal parts white vinegar and water in a container large enough to submerge the cookware. Soak the vessel for 1–6 hours, checking periodically. Vinegar dissolves rust but can damage iron if left too long.
- Scrub Thoroughly: Using a stiff brush or steel wool, scrub away loosened rust and residue. For stubborn spots, a bit of fine sandpaper can help.
- Neutralize Acidity: After removing from vinegar, rinse thoroughly and scrub with a paste of baking soda and water to neutralize any remaining acid.
- Dry Immediately: Towel dry and place the cookware in a warm oven (200°F/93°C) for 10–15 minutes to ensure all moisture is gone. This prevents new rust from forming.
For more tips on traditional fire-based cooking and cleaning, see our article on outdoor hospitality traditions.
Step 2: Repairing and Smoothing the Surface
Once the rust is gone, inspect the surface for rough patches or minor pitting. Light sanding with fine-grit sandpaper can help smooth out imperfections. Be gentle to avoid removing too much metal. If your vessel has deep pits or cracks, restoration may require professional attention, but most surface flaws can be improved at home.
After smoothing, wipe the cookware with a damp cloth to remove dust, then dry thoroughly.

Step 3: Seasoning for Protection and Performance
Seasoning is the process of building up a protective, non-stick layer on your cast iron. This is crucial for both performance and longevity. Here’s how to do it:
- Apply Oil: Rub a thin, even layer of vegetable oil, flaxseed oil, or a dedicated seasoning product over the entire surface, inside and out.
- Buff Off Excess: Use a clean cloth to wipe away any excess oil. Too much oil can result in a sticky finish.
- Bake: Place the cookware upside down in a preheated oven at 400–450°F (205–230°C). Place a sheet of foil on the lower rack to catch drips. Bake for 1 hour.
- Cool and Repeat: Allow the vessel to cool in the oven. For best results, repeat the oiling and baking process 2–3 times to build up a robust seasoning layer.
Regular use and proper cleaning will continue to improve the seasoning over time. For a deeper dive into the basics of cast iron care, see this introduction to cast iron cookware.
Maintaining Restored Cast Iron for Years to Come
Once your antique cookware is restored, a few simple habits will keep it in top condition:
- Clean with hot water and a stiff brush after each use. Avoid soap unless absolutely necessary.
- Dry thoroughly and apply a light coat of oil before storing.
- Store in a dry place, with lids off to prevent moisture buildup.
- Re-season as needed if food begins to stick or the finish looks dull.
By following these steps, your vintage cookware will remain both beautiful and functional, ready for everything from daily meals to special gatherings. If you’re interested in how different cultures use cast iron, check out our article on cultural kettle cooking traditions.
Frequently Asked Questions
Can I Use Soap When Cleaning Antique Cast Iron?
It’s generally safe to use a small amount of mild, unscented soap during the initial restoration process, especially when removing old grease or residue. However, for regular cleaning after seasoning, hot water and a stiff brush are usually sufficient. Excessive soap can strip the seasoning layer, so use it sparingly.
What If My Cast Iron Has a Crack?
Small hairline cracks may not affect usability for display or light use, but larger cracks can compromise safety and performance. Severely cracked pieces are best kept as decorative items or restored by a professional. Always inspect for cracks before attempting to cook with antique cookware.
How Often Should I Re-Season My Restored Cast Iron?
Frequency depends on use. If food begins to stick, the surface looks dull, or rust appears, it’s time to re-season. With regular use and proper care, a well-seasoned piece may only need a touch-up a few times a year.
Conclusion
Bringing old cast iron cookware back to life is a satisfying process that preserves both history and function. With patience and the right techniques, even the most neglected pieces can become cherished tools in your kitchen. Whether you’re passionate about restoring antique cast iron vessels for daily use or as part of a collection, these steps will help you achieve lasting results. For those who enjoy exploring traditional cooking methods, you might also appreciate learning about Eastern European kettle cooking and its rich culinary heritage.


