
Cooking bone broth outdoors over an open fire is a rewarding way to create a deeply flavorful, nourishing dish while enjoying the ambiance of nature. The process brings together traditional techniques, robust ingredients, and the unique character that only wood smoke and open flames can impart. Whether you’re a seasoned outdoor cook or just starting to experiment with fire pit meals, this guide will walk you through everything you need to know about preparing bone broth in the great outdoors.
Outdoor kettle cooking has a rich history, especially in regions where communal meals and rustic stews are part of the cultural fabric. If you’re interested in the roots of these traditions, you might enjoy learning more about eastern european kettle cooking and how these methods have influenced modern outdoor cuisine.
Why Make Bone Broth Over a Fire?
There’s something special about simmering a pot of broth over open flames. The slow, even heat of a fire pit allows bones and aromatics to release their nutrients and flavors gradually. The subtle smokiness from the wood or charcoal adds complexity that’s hard to replicate indoors. Outdoor cooking also encourages a slower pace, making the process as enjoyable as the final result.
Many outdoor enthusiasts appreciate the nutritional benefits of bone broth. It’s rich in collagen, minerals, and amino acids, making it a wholesome base for soups, stews, or even as a warming drink on chilly evenings. The hands-on nature of fire pit cooking also brings people together, turning meal preparation into a communal experience.
Essential Equipment for Bone Broth Outdoor Cooking
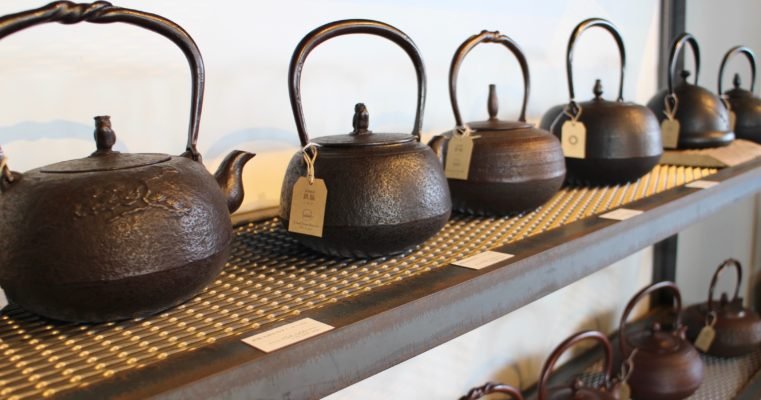
To get started, you’ll need some basic tools. The most important is a sturdy pot or kettle that can withstand direct heat. Cast iron is a popular choice for its durability and heat retention. For more details about the benefits and care of these vessels, check out this comprehensive guide to cast iron cookware.
- Cast iron kettle or Dutch oven: Ideal for even heating and long simmering times.
- Tripod or grill grate: Useful for suspending your pot over the fire or keeping it stable on hot coals.
- Long-handled utensils: For stirring and serving safely.
- Heat-resistant gloves: Essential for handling hot pots and adjusting the fire.
- Firewood or charcoal: Choose hardwoods like oak or hickory for a clean, steady burn and pleasant smoke flavor.
Before you start, make sure your cookware is properly seasoned and clean. This not only prevents sticking but also protects your pot from rust and imparts a subtle flavor to your broth.
Choosing the Best Ingredients for Outdoor Broth
The quality of your ingredients will determine the depth and richness of your broth. Start with a mix of beef, chicken, or pork bones—preferably with some meat and connective tissue attached. Roasting the bones beforehand, either at home or over the fire, can add a deeper flavor and color to your broth.
Classic aromatics like onions, carrots, celery, and garlic are essential. Herbs such as bay leaves, thyme, and parsley stems add complexity. For a smoky twist, consider adding a few charred vegetables or a handful of dried mushrooms. Season lightly with salt at the beginning, adjusting as the broth reduces.

Step-by-Step Guide to Fire Pit Bone Broth
- Prepare the fire: Build a medium fire and let it burn down to hot coals. You want steady, gentle heat for simmering, not a roaring flame.
- Brown the bones (optional): Place bones directly on the grill grate or in your pot to brown them over the fire. This step adds extra flavor and color.
- Add water and aromatics: Transfer the bones to your kettle, cover with cold water, and add your vegetables and herbs.
- Simmer gently: Suspend the pot over the fire or nestle it among the coals. Bring to a gentle simmer and skim off any foam that rises to the surface.
- Maintain the fire: Add wood or adjust the pot’s position as needed to keep the broth at a low simmer. Avoid boiling, which can make the broth cloudy.
- Cook for several hours: The longer you simmer, the richer your broth will become. Four to six hours is ideal, but even a couple of hours outdoors will yield good results.
- Strain and season: Remove the bones and vegetables, then strain the broth through a fine mesh or cheesecloth. Taste and adjust seasoning as needed.
Let the broth cool slightly before serving or storing. If you’re planning to use it later, chill it quickly and skim off any solidified fat for a clearer, lighter broth.

Tips for Success with Bone Broth Outdoor Cooking
- Control your heat: Use a tripod or move the pot closer or farther from the coals to maintain a gentle simmer.
- Keep the lid handy: Covering the pot helps retain heat and moisture, especially if it’s windy.
- Use clean, dry wood: Avoid softwoods or treated lumber, which can impart off-flavors or release harmful chemicals.
- Skim regularly: Removing foam and impurities results in a clearer, more refined broth.
- Experiment with flavors: Try adding different herbs, spices, or smoked ingredients for unique results.
Outdoor cooking is as much about the experience as the food. Take your time, enjoy the process, and don’t be afraid to adapt the method to your own tastes and setup.
Serving Suggestions and Storage
Once your broth is ready, there are countless ways to enjoy it. Serve it hot in mugs as a warming drink, use it as a base for soups and stews, or incorporate it into grain dishes and sauces. Outdoor bone broth pairs beautifully with rustic breads, roasted vegetables, or grilled meats.
For longer storage, let the broth cool completely, then refrigerate for up to five days or freeze in portions for several months. If you’re interested in the evolution of cooking vessels and how they’ve shaped outdoor cuisine, you might appreciate this article on the evolution of cooking vessels.
Expanding Your Outdoor Cooking Repertoire
Once you’ve mastered bone broth over the fire, consider exploring other traditional outdoor dishes. Stews, chilis, and even breads can be cooked in cast iron over a fire pit. For inspiration, look into historic kettle recipes or regional specialties that make use of the same techniques and equipment.
Outdoor cooking encourages creativity and adaptability. Each fire, batch of wood, and set of ingredients will yield slightly different results, making every meal a unique experience. Whether you’re cooking for a crowd or just yourself, the process is as rewarding as the flavors you create.
Frequently Asked Questions
How long should I simmer bone broth over a fire?
For the richest flavor and maximum nutrition, simmer your broth for at least four to six hours. If you’re short on time, even two hours will yield a tasty result, but longer cooking helps extract more collagen and minerals from the bones.
Can I use any type of bones for outdoor broth?
Yes, you can use beef, chicken, pork, or a combination. For the best results, include bones with some meat and connective tissue. Roasting the bones beforehand, either at home or over the fire, will enhance the broth’s flavor and color.
What’s the best way to control the temperature when cooking outdoors?
Maintain a gentle simmer by adjusting the pot’s distance from the coals or flames. Use a tripod, grill grate, or simply move the pot closer or farther from the heat source as needed. Keeping a lid on the pot also helps regulate temperature and retain moisture.
Conclusion
Preparing bone broth outdoors is a satisfying way to connect with traditional cooking methods and enjoy the rich, smoky flavors that only a fire pit can provide. With the right equipment, quality ingredients, and a bit of patience, you’ll create a nourishing broth that’s perfect for sharing around the fire. Whether you’re new to outdoor cooking or looking to expand your skills, this approach offers endless opportunities for delicious experimentation and memorable meals.


