There is something inherently satisfying about baking your own homemade bread. The aroma, texture, and taste of freshly baked crusty bread can make your kitchen feel like a professional bakery. But what if you dont have a Dutch oven? Fear not! In this comprehensive guide, we will explore a delicious crusty bread recipe no Dutch oven required, allowing you to create that perfect artisan loaf using equipment you probably already have in your kitchen.

Why Bake Bread Without a Dutch Oven?
Many traditional bread recipes call for the use of a Dutch oven, which helps in creating a steamy environment necessary for that coveted crispy crust. However, not everyone has a Dutch oven at home. This should not deter you from enjoying the pleasures of homemade bread. By leveraging alternative methods, you can achieve a similarly impressive crust and flavor. From using a baking stone to preheating a regular oven-safe pot, there are several techniques you can use to bake bread without a Dutch oven.
What You Need To Get Started
Ingredients
- 3 1/4 cups all-purpose flour
- 1 1/2 cups warm water
- 1 teaspoon salt
- 1 teaspoon sugar
- 1 teaspoon active dry yeast
Step-by-Step Guide
Step 1: Activate the Yeast
In a small bowl, combine the warm water (about 110F) with the active dry yeast and sugar. Stir until dissolved and let it sit for about 5-10 minutes, until it becomes frothy. This step is crucial as it proves that the yeast is alive and active, setting the stage for your bread to rise.
Step 2: Mix the Dough
In a large mixing bowl, combine the flour and salt. Gradually add the yeast mixture to the flour, stirring with a wooden spoon or a dough hook if you are using a stand mixer. The dough should come together and form a sticky mass.
Step 3: Knead the Dough
Transfer the dough to a lightly floured surface and knead it for about 10 minutes, until it becomes smooth and elastic. If you are using a stand mixer, knead the dough with the dough hook attachment on medium speed for about 5 minutes.
Step 4: First Rise
Place the dough in a greased bowl, cover it with a damp cloth, and let it rise in a warm place for about 1-1.5 hours, or until it has doubled in size.
Step 5: Shape the Dough
After the dough has risen, punch it down to release the air. Transfer it to a floured countertop and shape it into a round or oval loaf, depending on your preference. Be gentle during this process to maintain the airiness of the dough.
Step 6: Second Rise
Place the shaped dough on a parchment-lined baking sheet. Cover it with a damp cloth and let it rise again for about 30-45 minutes. Preheat your oven to 450F around 30 minutes into the second rise.
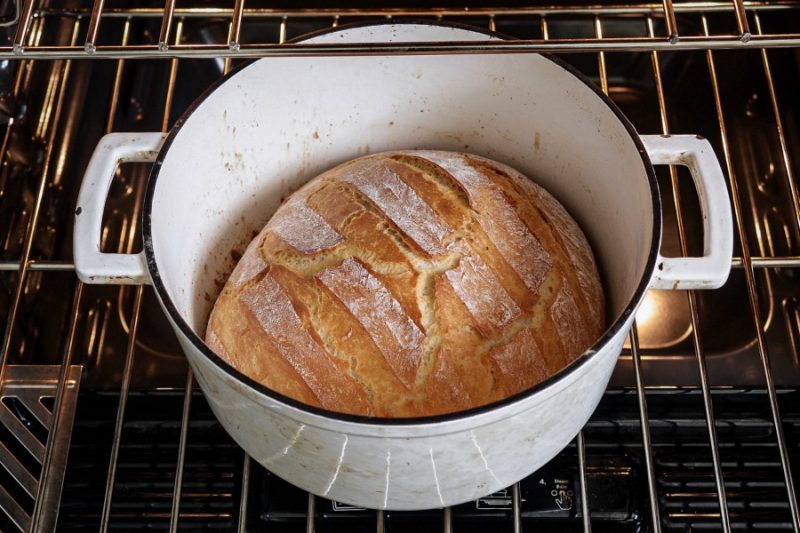
Step 7: Bake the Bread
Use a sharp knife to score the top of the loaf with a few slashes. This allows the steam to escape, giving the bread its signature crust. Place an oven-safe pot (without the lid) or a baking stone at the bottom of the oven to preheat as well. Transfer the dough, along with the parchment paper, to the pot or onto the stone. Quickly shut the oven door to retain as much heat as possible.
Step 8: Create Steam
For that crunchy crust, quickly pour a cup of hot water into a shallow pan or tray placed at the bottom of the oven. This creates steam, which is crucial for forming the crust. Bake the bread for about 30 minutes.
Step 9: Cool the Bread
Remove the bread from the oven and transfer it to a wire rack to cool completely before slicing. Slice with a sharp knife and serve it on a sturdy cutting board.
Bread Baking Tips for Best Results
Crusty bread relies heavily on precise techniques and quality ingredients. Here are some tips to ensure you get the best results:
- Use Bread Flour: While all-purpose flour works, bread flour, which has higher protein content, will give you a chewier texture.
- Measure Ingredients Accurately: Use a kitchen scale to measure your flour and water by weight for the most accurate results.
- Maintain Proper Hydration: The dough for crusty bread is usually wetter than other doughs. This high hydration helps in creating a more open crumb structure.
- Practice Proper Scoring: Scoring not only makes your loaf look professional but helps in controlling the bread’s expansion during baking.
- Utilize Steam: Steam is essential for creating a crusty exterior. If you don’t have a special pot, create steam by placing a shallow pan of water at the bottom of the oven.
:max_bytes(150000):strip_icc()/Testing-StaubCastIron5.5QuartRoundCocotte-3-WillDickey-1342-376-33155a88784443eaa706f540ffb27b0d.jpg)
Alternative Methods for Creating Steam
If you are not using a Dutch oven, creating steam is essential for achieving a thick, crispy crust. Here are some alternative methods:
Method 1: Baking Stone and Tray
A baking stone, also known as a pizza stone, can help distribute heat evenly. Place the stone in the middle rack and a shallow tray below it. Preheat both for at least 30 minutes. Place the dough on the stone, and pour hot water into the tray right before you close the oven door.
Method 2: Ice Cubes
Place a few ice cubes on a hot cast iron skillet at the bottom of the oven. The melting ice will create steam, which enhances the crust’s texture.
Storing Your Homemade Bread
To keep your bread fresh and crusty for as long as possible, its crucial to store it properly. Here are some storage tips:
- Cool Completely: Let your bread cool completely before storing. This stops condensation from making the crust soggy.
- Use Cloth Bags: Instead of plastic bags, use cloth bags or paper bags to store the bread. This will help maintain the crispness of the crust.
- Freezing: If you need to store the bread for more than a couple of days, consider freezing it. Slice the bread before freezing, so you can take out only the slices you need, rather than defrosting the entire loaf.
Essential Cookware and Tools for Bread Baking
Having the right tools can make the process of bread baking much smoother. Here are some suggestions:
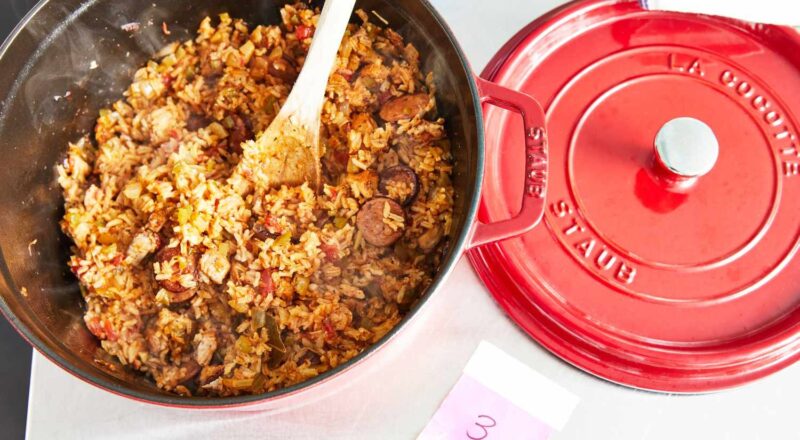
- Dutch Oven: Useful for other recipes, though not required for this one.
- Sharp Knife: For scoring the dough and slicing the bread.
- Cutting Board: To assemble and slice your bread.
Wrapping Up
Baking bread can be incredibly rewarding, and you dont need special equipment like a Dutch oven to achieve professional-quality results. The methods and tips outlined in this article should help you make delicious crusty bread in the comfort of your home. If you enjoyed this recipe, consider exploring other bread recipes like sourdough or rye, which offer new techniques and flavors.
For more inspiration and recipes, feel free to check out how to make chili, differences between Dutch oven and pot, how to store Dutch oven, common size Dutch oven, and sticky Dutch oven!
For more useful cookware cleaning tips, visit season a cast iron or check out some cast iron recipes. Happy baking!
As an Amazon Associate, I earn from qualifying purchases.