
If you’ve ever wondered how to make the perfect white bread recipe in a Dutch oven, you’ve come to the right place. Baking bread at home is a gratifying experience that not only fills your kitchen with the delightful aroma of freshly baked bread but also allows you to enjoy a delicious and wholesome loaf. This article aims to teach you every little detail about making the perfect white bread using a Dutch oven and share some tips to ensure success every time.
The Appeal of Dutch Oven Bread
Baking bread in a Dutch oven has become increasingly popular among home bakers, chefs, and kitchen enthusiasts. The Dutch oven’s unique structure allows it to function as a mini-oven, providing the perfect environment for bread to rise and bake evenly. The heavy lid traps steam, resulting in a crispy, golden crust and a soft, tender crumb. With a little patience and the right technique, you can recreate this bakery-quality bread in the comfort of your kitchen.
Moreover, using a Dutch oven simplifies the bread-making process, eliminating the need for complicated baking setups. Whether you’re a novice or a seasoned baker, the Dutch oven offers consistency and reliability, making it an invaluable tool for baking enthusiasts. Learn more about utilizing your Dutch oven effectively in baking and beyond.
Essential Tools and Ingredients
Before you embark on your journey to bake the ultimate white bread, it’s essential to gather the right tools and ingredients. Here’s a comprehensive list:
- Dutch oven – A high-quality Dutch oven is a must for this recipe. How to store your Dutch oven correctly to ensure its longevity.
- Mixing bowls – Various sizes for combining ingredients and proofing the dough.
- Bench scraper – For handling and dividing dough.
- Plastic wrap – To cover the dough as it rises.
- Kitchen scale – For accurately measuring ingredients.
- Sharp knife or Bread Knife – Essential for scoring the dough before baking.
- Cutting board – Ideal for kneading and shaping the dough. Condition your cutting board regularly for optimal performance.
- Ingredients:
- Flour – All-purpose flour works best for this bread recipe.
- Water – Tap water is suitable, but filtered water is preferable.
- Yeast – Active dry yeast or instant yeast.
- Salt – To balance the flavors.
- Sugar – A little sugar to feed the yeast and aid in rising.
Step-by-Step Guide to Making White Bread Recipe in a Dutch Oven
Here’s an in-depth look at each step required to create a perfect loaf of white bread using a Dutch oven:
Step 1: Preparing the Dough
Begin by combining the dry ingredients in a large mixing bowl. Measure out 500 grams of all-purpose flour and sift it to remove any clumps. Add 2 teaspoons of salt and 1 teaspoon of sugar to the flour. In a separate bowl, dissolve 1 teaspoon of active dry yeast in 350 milliliters of warm water (around 100F) and let it sit for about 5 minutes until it becomes frothy.
Once the yeast has activated, create a well in the center of the flour mixture and pour the yeast mixture into it. Use a bench scraper or a wooden spoon to combine the ingredients until a shaggy dough forms. Don’t worry if it looks a bit messy; it will come together as you knead it.
Step 2: Kneading the Dough
Transfer the dough to a lightly floured surface and start kneading. Use the heel of your hand to push the dough away from you, then fold it back towards you. Rotate the dough and repeat the process. Knead for about 10 minutes, or until the dough becomes smooth and elastic. This step is crucial as it develops the gluten, which gives the bread its structure.
Cover the dough with a damp kitchen towel or plastic wrap and let it rest for 15-20 minutes. This resting period is known as autolyse and helps the flour absorb the water, making the dough easier to work with.
Step 3: First Rise (Bulk Fermentation)
After autolyse, continue kneading the dough for another 5 minutes. Shape the dough into a ball and place it in a lightly greased mixing bowl. Cover it with plastic wrap or a damp kitchen towel and let it rise in a warm, draft-free area for about 1 to 2 hours, or until it has doubled in size.
The first rise is known as bulk fermentation, and it’s a crucial step in developing the flavor and structure of your bread. The yeast ferments the sugars in the dough, producing carbon dioxide gas that causes the dough to rise.
Step 4: Shaping the Dough
Once the dough has doubled in size, gently punch it down to release the trapped gases. Transfer the dough to a lightly floured surface and knead it briefly to knock out any large air bubbles. Shape the dough into a round ball or an oval, depending on your preference. If you’re using a proofing basket, place the dough seam-side up in the basket, otherwise, place it seam-side down on a lightly floured surface.
Cover the shaped dough with plastic wrap or a kitchen towel and let it proof for 30-60 minutes. This second rise is called the final proofing, and it’s essential for achieving the perfect texture in your finished loaf.
Step 5: Preheating the Dutch Oven
While the dough is proofing, place your Dutch oven in the oven and preheat it to 450F (230C). Preheating the Dutch oven ensures that it’s hot enough to create the steam needed for a crispy crust. This step also helps the bread to rise quickly during the initial phase of baking, known as oven spring.
Make sure to place the Dutch oven on the center rack of your oven to ensure even heat distribution.
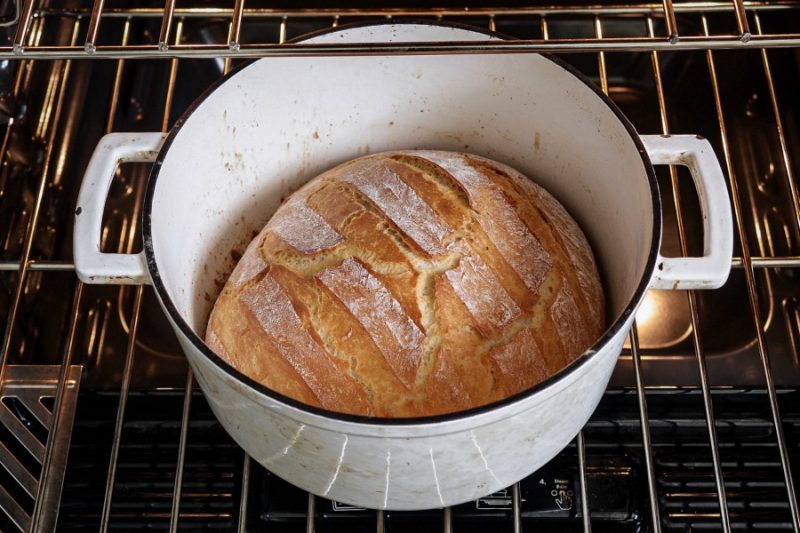
Step 6: Baking the Bread
Once the Dutch oven is preheated, carefully remove it from the oven using oven mitts. Remove the lid and place a sheet of parchment paper on the bottom of the Dutch oven. Gently transfer your proofed dough onto the parchment paper. Use a sharp knife or a razor blade to score the top of the dough with a few shallow slashes; this will allow steam to escape and help the bread expand while baking.
Cover the Dutch oven with its lid and place it back in the oven. Bake for 20-25 minutes with the lid on, and then remove the lid and bake for an additional 15-20 minutes, or until the crust is golden brown and the bread sounds hollow when tapped on the bottom.
Step 7: Cooling and Storing the Bread
Once the bread is baked to perfection, carefully remove it from the Dutch oven and place it on a wire rack to cool. Allow the bread to cool completely before slicing into it; this will ensure that the crumb sets properly and the bread is easy to slice.
White bread can be stored at room temperature in a bread box or a paper bag for up to three days. If you want to keep it for longer, you can also freeze it. To freeze, wrap the bread tightly in plastic wrap and place it in a freezer-friendly bag. Thaw it at room temperature or in the oven when ready to eat.
Tips for Perfect White Bread Every Time
Even though making bread might seem intimidating at first, there are a few tips and tricks to help you achieve perfect results every time. Understanding these concepts will help you master the art of bread making and take your skills to the next level.
Hydration Level
The hydration level of your dough refers to the ratio of water to flour in your recipe. A higher hydration level results in a softer, airier crumb, but it also makes the dough stickier and more challenging to handle. For beginners, a hydration level of around 70% (i.e., 700 grams of water for every 1000 grams of flour) is a good starting point. As you become more comfortable with the dough, you can experiment with higher hydration levels for different textures.
Autolyse
As mentioned earlier, autolyse is a resting period after combining the flour and water but before adding the yeast and salt. This step allows the flour to fully hydrate and begin developing gluten, making the dough easier to work with and improving the texture of the finished bread.
Types of Flour
While all-purpose flour works well for this recipe, different types of flour can yield different results. Bread flour, which has a higher protein content, can produce a higher rise and chewier texture, while whole wheat flour adds a nutty flavor and denser crumb. Feel free to experiment with different flours to find your preferred combination.
Proofing Environment
The environment in which you proof your dough can significantly impact its rise. A warm, draft-free area is ideal for most yeast bread recipes. If your kitchen is cold, you can create a makeshift proofing box by placing your dough in the oven (turned off) with a bowl of hot water on the shelf below. The steam from the water will create a warm, humid environment that’s perfect for proofing.
Scoring
Scoring the dough not only gives your bread an attractive appearance but also allows it to expand during baking. Use a sharp knife or a razor blade to make shallow cuts on the surface of the dough just before placing it in the oven. Experiment with different scoring patterns to create unique and beautiful loaves.
Cleaning and Maintaining Your Dutch Oven
Your Dutch oven is an investment that can last a lifetime with the proper care. After baking, allow your Dutch oven to cool completely before cleaning it. Avoid using harsh detergents or metal scrubbers, which can damage the surface. Instead, follow this simple guide on how to maintain and clean your Dutch oven effectively.
Additionally, for detailed instructions on caring for your Dutch oven, check out this in-depth article. Regular maintenance will keep your Dutch oven in excellent condition and ensure that it continues to bake beautiful bread for years to come.
Conclusion
Baking a delicious loaf of white bread in a Dutch oven is a rewarding and enjoyable experience. By following this comprehensive guide and paying attention to the details, you can achieve bakery-quality results right in your home kitchen.
Whether you’re a seasoned baker or just starting, the tips and techniques shared in this article will help you master the art of making perfect white bread in a Dutch oven. Enjoy the process, experiment with different ingredients and methods, and most importantly, savor every bite of your homemade bread.
For more information on related bread recipes, check out this easy-to-follow recipe.
As an Amazon Associate, I earn from qualifying purchases.