Are you wondering how to transfer sourdough into a Dutch oven? A Dutch oven is an indispensable tool for baking sourdough bread. Mastering this process can elevate your bread baking to the next level. Whether you are a novice or an experienced baker, understanding the right techniques to transfer the dough into the Dutch oven is crucial.
The process might seem daunting at first, but with the right knowledge, it can become second nature. A Dutch oven helps in creating that perfect crust and maintaining moisture during baking. In this article, we’ll delve into every detail you need to know about transferring sourdough into a Dutch oven confidently and effortlessly.
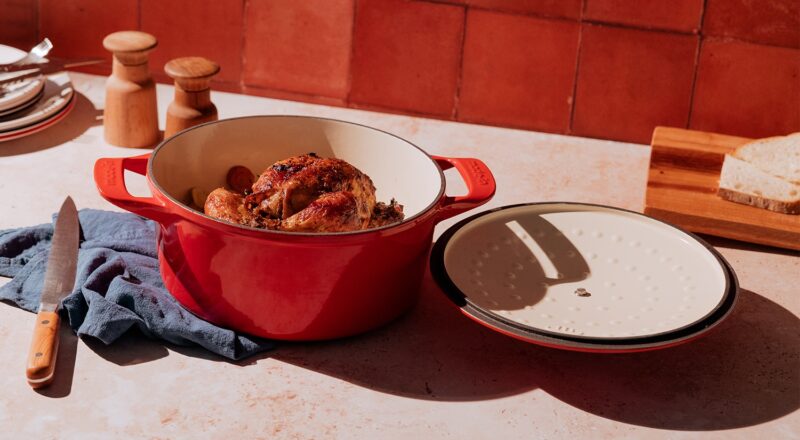
Why Use a Dutch Oven for Sourdough Bread
The Role of Heat Retention
One of the primary reasons bakers prefer a Dutch oven is its excellent heat retention. It allows the bread to bake evenly, leading to a more consistent crust and crumb.
With its heavy and thick walls, the Dutch oven can mimic the steaming effect necessary for sourdough bread. This creates an ideal environment for your dough to rise and develop a beautiful, crispy crust.
Creating the Ideal Steam Environment
Steam plays a critical role in baking sourdough. It keeps the dough surface flexible for a longer time, allowing the bread to expand fully.
A Dutch oven traps the steam released from the dough, creating the perfect conditions for a professional-quality loaf.

Preparing Your Sourdough Dough
Fermentation is Key
The first step in the process is getting your dough ready for baking. The fermentation stage is crucial for developing the flavor and texture of sourdough.
Make sure your dough has been properly fermented before you attempt to transfer it into the Dutch oven. This usually involves several hours of resting and rising.
Shaping Your Dough
Shaping the dough correctly will help it maintain its structure as you move it into the oven. After the initial rise, gently shape your dough into a round or oval loaf.
Place it in a proofing basket or bowl lined with a floured cloth to help hold its shape during the final rise.

Tools You’ll Need
The Right Equipment
Having the right tools can make the transfer process much easier. Some essential items include:
- Bench scraper or dough lifter
- Parchment paper
- Sharp scoring knife or lame
- Heat-resistant gloves or mitts
These tools will help you handle the dough and Dutch oven safely and efficiently.
Preheating Your Dutch Oven
Importance of Preheating
Preheating your Dutch oven is a step you shouldn’t skip. It ensures the dough starts baking immediately upon contact, which is essential for achieving the desired crust and oven spring.
Place your Dutch oven with its lid on inside the oven and preheat it to your desired baking temperature for at least 30-45 minutes.
Transferring the Dough
Using Parchment Paper
Placing your dough on a piece of parchment paper makes the transfer process much smoother. It prevents the dough from sticking to surfaces and allows you to lift it easily into the hot Dutch oven.
Scoring the Dough
Before you transfer the dough, use a sharp knife or lame to score the surface. This allows the dough to expand properly and develops that iconic sourdough appearance.
The Transfer Technique
With the dough on parchment paper, carefully lift and lower it into the preheated Dutch oven. Be cautious to avoid burns and ensure the lid is replaced quickly to retain steam.
Baking Your Sourdough
Initial High Heat
Start the baking process at a high temperature, usually around 450F. This is crucial for the first 20-25 minutes to encourage oven spring and crust formation.
Reducing the Temperature
After the initial bake, reduce the temperature to around 400F. This allows the interior of the bread to cook thoroughly without the crust becoming too dark.
Cooling Your Bread
Importance of Cooling
Once the bread is done baking, remove it from the Dutch oven and let it cool on a wire rack. This step is vital for the final texture and flavor.
Avoid Cutting Too Soon
Resist the temptation to cut your bread immediately. Let it cool completely to ensure the crumb sets properly, making it easier to slice and enjoy.
Troubleshooting Common Issues
Sticking Dough
If your dough sticks to the Dutch oven, ensure you are using enough flour or parchment paper.
Preheat your Dutch oven properly to prevent sticking and achieve a better crust.
Burning Crust
If your crust tends to burn, consider reducing the initial baking temperature or shortening the initial high-heat phase.
Experiment with different timings to find the perfect balance for your specific oven.
Maintaining Your Dutch Oven
Cleaning After Use
Keeping your Dutch oven clean is essential for its longevity. After each use, allow it to cool slightly before washing it with warm water and a mild detergent.
Avoid using harsh chemicals or abrasive materials that could damage the enamel coating.
Regular Maintenance
Periodically, check your Dutch oven for any cracks or chips. A well-maintained Dutch oven will serve you for many years, ensuring consistently excellent sourdough bread.
Frequently Asked Questions
What size Dutch oven is best for sourdough bread?
A 5-6 quart Dutch oven is usually ideal for most loaves of sourdough bread.
Do I need to preheat the Dutch oven?
Yes, preheating is crucial for achieving the best crust and oven spring in your sourdough bread.
Can I use parchment paper?
Using parchment paper makes transferring the dough much easier and prevents sticking.
Internal and External Resources
For more tips on making bread in a Dutch oven, check out this link. Also, learn how to clean your Dutch oven efficiently. For comprehensive advice on Dutch ovens, visit this page.
External resource:How to clean your Dutch oven.
As an Amazon Associate, I earn from qualifying purchases.
As an Amazon Associate, I earn from qualifying purchases.