How to Use an Aebleskiver Pan Step by Step Guide: Detailed Instructions for Best Results
Learning how to use an aebleskiver pan can open up a world of culinary delights. Whether you’re a seasoned chef or a kitchen novice, mastering the use of this unique pan is sure to delight your taste buds with perfect, fluffy aebleskivers and more. This step-by-step guide will walk you through not only the process of using an aebleskiver pan but also how to care for it and explore other creative culinary uses.

The Fascinating History of Aebleskivers
Aebleskivers are Danish pastry balls traditionally served during the Christmas season. The origins of these delightful treats date back centuries. Despite the festive connotation, aebleskivers have gained popularity year-round. They are adored for their pillowy texture and the vast array of fillings, both sweet and savory, that can be stuffed inside.
Understanding the Aebleskiver Pan
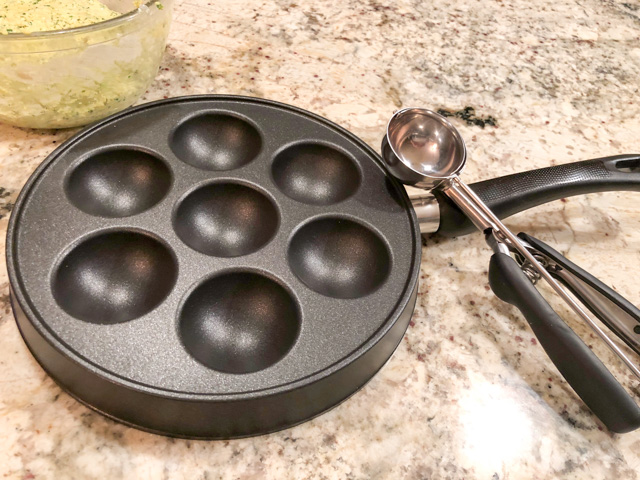
Features and Design
The key to aebleskivers lies in their round shape, achieved with the help of an aebleskiver pan. This pan has several half-spherical molds to hold the batter, allowing each aebleskiver to cook evenly.
Materials and Variations
Aebleskiver pans are typically made from cast iron, offering excellent heat retention. However, non-stick and aluminum options are also popular. Your choice will affect your cooking experience and maintenance needs. For more on cast iron usage and care, explore cast iron grill maintenance.
Step-by-Step Guide to Using an Aebleskiver Pan
Preparation Basics
Before getting started, season your cast iron aebleskiver pan if it’s new. This involves lightly coating the pan with oil and heating it to ensure a non-stick surface. For detailed seasoning tips, check out pie iron vs. sandwich press.
Gathering Ingredients
Traditional aebleskiver batter consists of flour, eggs, milk, and a pinch of salt. Alternatives to regular milk, such as almond or soy milk, can be used without altering the texture too much.
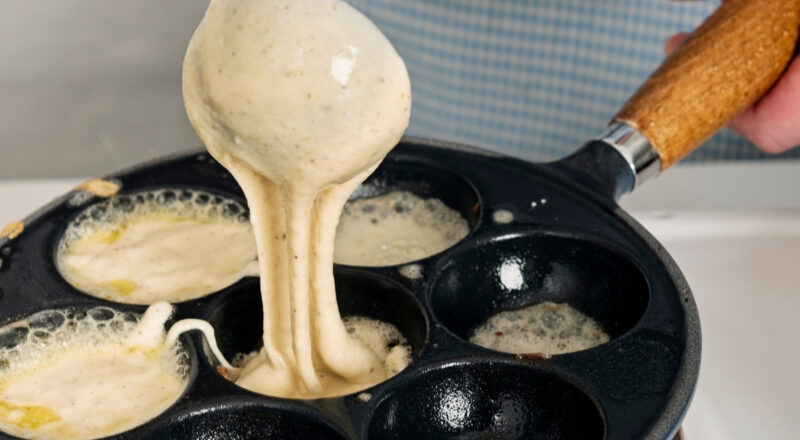
Cooking Aebleskivers
Heat the pan over medium heat and add a small amount of butter or oil to each mold. Fill each mold about halfway with batter. As the edges start to set, use a skewer to carefully turn the aebleskivers, allowing them to form a complete ball as they cook.
Tips for Perfect Aebleskivers
Managing Heat
Temperature control is essential. Keep the heat at medium to prevent burning the outside while the inside remains undercooked.
Flipping Technique
Confidence and practice with the turning process can prevent spills and ensure a perfect round shape.
Cleaning and Maintaining Your Aebleskiver Pan
For cast iron pans, avoid soapy water. Instead, use a brush and hot water to clean. Re-season periodically to maintain a non-stick surface. Refer to detailed maintenance guides like [this](https://howtocleancastiron.com/portable-compact-tripod-grills-for-backpacking-adventures-3/) for more on caring for cast iron cookware.
Creative Uses Beyond Aebleskivers
An aebleskiver pan can be an innovative tool for cooking other foods. Experiment with meatballs, poached eggs, or pancakes for a unique twist on classic dishes. For diverse recipe ideas, check the [Epicurious guide](https://www.epicurious.com/shopping/aebleskiver-pans-are-for-more-than-just-aebleskivers) (rel=’nofollow’).
FAQs
What are common mistakes when using an aebleskiver pan?
Common mistakes include using too high a heat, overfilling molds, and failing to season a new pan adequately.
Can I use a non-stick aebleskiver pan?
Yes, non-stick pans are easier to use and require less seasoning, though they may not impart the same depth of flavor as cast iron.
Are there alternative recipes for aebleskivers?
Absolutely! Consider experimenting with different batters, like buckwheat or gluten-free. Fillings can include cheese, fruit, or chocolate for a twist on the original.
This article contains affiliate links. We may earn a commission at no extra cost to you.