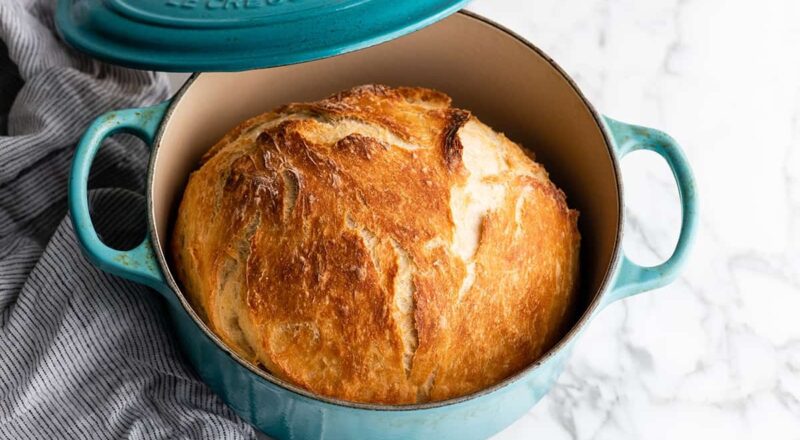
Baking sourdough bread has become a beloved activity among bakers of all levels. If you’re aiming to achieve that perfect crust and flavorful crumb, you’ll be delighted to know that using a Dutch oven can significantly enhance your results. Let’s dive into how to bake sourdough bread in a Dutch oven!

Why Use a Dutch Oven for Baking Sourdough Bread
A Dutch oven provides the ideal environment for baking sourdough bread. Its thick walls ensure even heat distribution, while its lid helps retain steam, crucial for developing a crispy crust. This method mimics the conditions of a professional steam-injected oven.
Choosing the Right Dutch Oven
When selecting a Dutch oven, consider its size and material. A 5-7 quart Dutch oven is perfect for most bread recipes. Cast iron varieties are particularly recommended due to their heat retention and durability.
:max_bytes(150000):strip_icc()/Which-Dutch-Oven-Size-Is-Right-for-You-FW-tout-72667962e9d849258bce69ba1e82a7b9.jpg)
Ingredients You’ll Need
- 500g bread flour
- 350g water
- 100g active sourdough starter
- 10g salt

Step-by-Step Guide
Preparing the Dough
Combine your ingredients and mix until no dry flour remains. Allow it to rest (autolyse) for 30 minutes to an hour. This relaxes the gluten and makes it easier to work with.
Kneading and Folding
After the autolyse, perform a series of stretch and folds every 30 minutes for about 2 hours. This helps develop the dough’s strength and structure.
Bulk Fermentation
Let the dough ferment for 3-4 hours at room temperature until it doubles in size. For a slower, more flavorful fermentation, you can refrigerate it overnight.
Shaping the Dough
Once the dough has doubled, turn it out onto a lightly floured surface. Shape it into a round ball (boule) or oval (batard) and let it rest for 20 minutes.
Final Proofing
Place the shaped dough into a proofing basket (banneton) lined with a floured cloth. Allow it to rise for another 1-2 hours at room temperature or refrigerate for 8-12 hours.
Preheating the Dutch Oven
About 30 minutes before baking, preheat your oven to 450F (230C) with the Dutch oven inside. This ensures the pot is hot enough to create steam when the bread is added.
Scoring the Dough
Gently turn your proofed dough onto a piece of parchment paper. Use a sharp knife or razor blade to score the top of the dough. This allows the bread to expand properly while baking.
Baking the Bread
Carefully place the scored dough into the preheated Dutch oven. Cover with the lid and bake for 20 minutes. Then, remove the lid and bake for an additional 25-30 minutes until the crust is a deep golden brown.
Cooling the Bread
Once baked, remove the bread from the Dutch oven and let it cool on a wire rack for at least an hour before slicing. This ensures the crumb sets properly.
Maintaining Your Dutch Oven
To keep your Dutch oven in top condition, always follow the manufacturer’s cleaning and care instructions. Usually, washing with warm, soapy water and avoiding harsh scrubbing or metal utensils will help preserve its longevity.
Common Issues and How to Fix Them
Dense or Heavy Bread
If your bread turns out too dense, it could be due to under-proofing or not enough steam. Ensure your dough has risen adequately and that your Dutch oven is properly preheated.
Burnt Crust
A burnt crust usually results from too high an oven temperature or baking for too long. Try reducing the temperature slightly and keeping a close eye on your bread during the final stages of baking.
Flat Bread
Flat bread can occur if the dough is over-proofed. Make sure to keep an eye on the dough during the proofing stages and bake it when it has approximately doubled in size.
FAQs
Can I use a ceramic Dutch oven?
Yes, ceramic Dutch ovens can also be used for baking bread. Just ensure it can withstand high oven temperatures.
Do I need parchment paper?
While not essential, parchment paper makes transferring the dough easier and prevents sticking, especially with new Dutch ovens.
Can I bake without the lid?
Baking with the lid helps create steam for a crusty exterior. However, it’s possible to bake without the lid, but you may not get the same crust quality.
As an Amazon Associate, I earn from qualifying purchases.
As an Amazon Associate, I earn from qualifying purchases.

