Everyone loves a hearty, flavorful meal that brings the family together. One recipe that stands out for its delicious taste and ease of preparation is the dutch oven chicken thigh recipe. Cooking chicken thighs in a dutch oven ensures that your meat stays juicy, tender, and packed with mouthwatering flavors. This article will guide you through every step of this recipe, from gathering ingredients to serving up a sumptuous meal.

Why Choose Dutch Oven for Chicken Thighs?
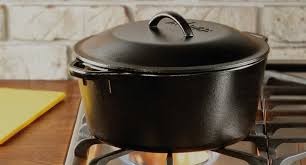
The dutch oven is a versatile piece of cookware that absolutely excels in cooking chicken thighs. Here’s why:
- Even Heat Distribution: Dutch ovens, whether made of cast iron or enameled cast iron, are excellent at retaining and evenly distributing heat. This ensures thorough cooking without hot spots.
- Moisture Retention: The tight-fitting lid helps to seal in moisture, resulting in juicy, tender chicken.
- Versatility: You can sear, braise, and roast in the same pot, making it a one-stop cooking solution.
- Durability: A good dutch oven will last for years, often becoming a family heirloom.
You can find more about why dutch ovens work so well in cooking chicken thighs here.
Ingredients and Essential Cookware
- 8 chicken thighs, bone-in, skin-on
- 2 tablespoons olive oil
- 1 large onion, thinly sliced
- 4 garlic cloves, minced
- 1 cup chicken broth
- 1/2 cup dry white wine
- 1 teaspoon dried thyme
- 1 teaspoon dried rosemary
- 1 teaspoon paprika
- Salt and pepper to taste
- 1 lemon, thinly sliced
Essential Cookware:
Step-by-Step Cooking Instructions
Preparation
Before you start cooking, it’s essential to have all your ingredients prepped and ready. Let’s dive into details on how you can get things going smoothly.
1. Seasoning the Chicken Thighs: Begin by patting the chicken thighs dry with paper towels. This helps in achieving a crispier skin. Season both sides generously with salt, pepper, paprika, thyme, and rosemary. Allow the chicken to sit for about 10 minutes while you prepare your other ingredients.
2. Slicing Onions and Garlic: Using a sharp knife, thinly slice a large onion and mince four cloves of garlic. This combination will infuse your chicken with robust flavors as it cooks.
More information on properly slicing can be found in this external guide.
Searing the Chicken Thighs
Now that everything is prepped, it’s time to get cooking:
1. Heating the Dutch Oven: Place your dutch oven on medium-high heat and add two tablespoons of olive oil. Allow the oil to heat up until it shimmers but isn’t smoking.
2. Searing: Carefully place the chicken thighs in the hot oil, skin side down. Sear for 5-7 minutes until the skin is golden brown and crispy. Flip the thighs and sear the other side for another 3-4 minutes. Remove the chicken thighs from the dutch oven and set aside.
Braising the Chicken
With the chicken thighs seared, it’s time to move on to the braising process:
1. Sauting Onions and Garlic: In the same dutch oven, add the sliced onions and minced garlic. Saut them until they become fragrant and start to soften, usually about 5 minutes.
2. Deglazing the Pan: Pour in 1/2 cup of dry white wine to deglaze the pan. Scrape the bottom with a wooden spoon to release all those delicious brown bits stuck to the bottom.
3. Adding Chicken Broth: Pour in 1 cup of chicken broth, stirring to combine all the flavors. Allow the mixture to come to a gentle simmer.
4. Returning Chicken Thighs: Nestle the seared chicken thighs back into the dutch oven. Arrange lemon slices over the top and cover with the lid.
To understand more about the braising process, you can check out his article.
Oven Baking
1. Preheating the Oven: While you’re braising the chicken on the stovetop, preheat your oven to 350F (175C).
2. Baking: Transfer the dutch oven to the preheated oven. Bake, covered, for about 45 minutes. This will ensure the chicken thighs are cooked through and tender.
3. Crisping the Skin: For an even crispier skin, uncover the dutch oven for the last 10 minutes of baking. Keep an eye on it to make sure it doesnt burn.
Serving Suggestions
This dutch oven chicken thigh recipe is versatile and can be served with various sides to make a complete meal:
- Mashed Potatoes: The rich, creamy texture of mashed potatoes pairs perfectly with the succulent chicken thighs.
- Steamed Vegetables: A medley of steamed vegetables like broccoli, carrots, and green beans can add a pop of color and nutrition to your plate.
- Rice Pilaf: A well-seasoned rice pilaf can soak up the delectable juices from the chicken, making each bite delightful.
- Crusty Bread: For a more casual meal, serve with crusty bread to mop up the flavorful sauce.
Cleaning Your Cookware
After enjoying your meal, it’s crucial to clean your dutch oven properly to maintain its quality. Check out this guide for tips on how to clean and store your dutch oven. For an effective cleaner, consider using the Cookware Cleaner.
Conclusion: A Dish to Remember
This dutch oven chicken thigh recipe is not just any ordinary meal; it’s an experience in itself. The rich, aromatic flavors combined with the tender, juicy chicken make it a dish that will undoubtedly become a family favorite. Whether you’re cooking for a weeknight dinner or a special occasion, this recipe promises to deliver satisfaction and delight. Happy cooking!
As an Amazon Associate, I earn from qualifying purchases.