Welcome to an in-depth guide on creating the perfect french bread recipe dutch oven. Nothing beats the smell of freshly baked bread wafting through your home, especially when it’s authentic French bread. Using a Dutch oven not only enhances the texture and flavor but also makes the process simpler and more enjoyable.

The Magic of Baking in a Dutch Oven
Baking bread in a Dutch oven is a traditional method that has been used for centuries. This versatile piece of cookware retains heat excellently, creating an ideal environment for bread to rise and bake evenly. The Dutch oven‘s heavy lid traps steam, an essential component for developing that coveted crispy crust and airy interior.

Why French Bread?
French bread holds a special place in the world of baking. Known for its crisp crust, soft interior, and slender, elongated shape, French bread is perfect for sandwiches, garlic bread, or just enjoyed with some butter. Mastering a french bread recipe dutch oven at home means you can enjoy this bakery-quality delight any time you like.
Ingredients for Your French Bread
- 2 1/4 teaspoons active dry yeast
- 1 1/2 cups warm water (about 110F)
- 3 1/2 to 4 cups all-purpose flour
- 2 teaspoons sugar
- 2 teaspoons salt
While the list of ingredients is simple, the process and attention to detail are what make this french bread recipe dutch oven truly special.

Step-by-Step Process: Making Perfect French Bread
Step 1: Activate the Yeast
In a large bowl, dissolve the sugar in the warm water. Sprinkle the yeast over the water and let it sit for about 5-10 minutes until it becomes frothy. This is a crucial step to ensure your bread rises properly.
Step 2: Prepare the Dough
Add the salt and gradually mix in the flour one cup at a time, stirring until the dough begins to come together. You may not need all the flour, so add it slowly to achieve the right consistency. The dough should be slightly sticky but manageable.
Step 3: Knead the Dough
Transfer the dough to a floured surface and knead it for about 8-10 minutes until it becomes smooth and elastic. This helps develop the gluten, which is key for a fluffy interior. Feel free to take your time with this step, as it’s what makes the final product delightful.
Step 4: First Rise
Place the dough in a lightly oiled bowl, cover it with a damp cloth, and let it rise in a warm area for about 1-2 hours, or until it’s doubled in size. Patience is key here; let the yeast do its magic.
Step 5: Second Rise in the Dutch Oven
Punch down the risen dough to release any air bubbles. Shape it into a loaf and place it in a lightly floured Dutch oven. Cover the Dutch oven with its lid and let it rise for another 30 minutes.
Step 6: Preheat Your Oven
While the dough is rising, preheat your oven to 450F. This high temperature is essential for getting that crispy crust while ensuring the bread cooks evenly inside.
Step 7: Bake to Perfection
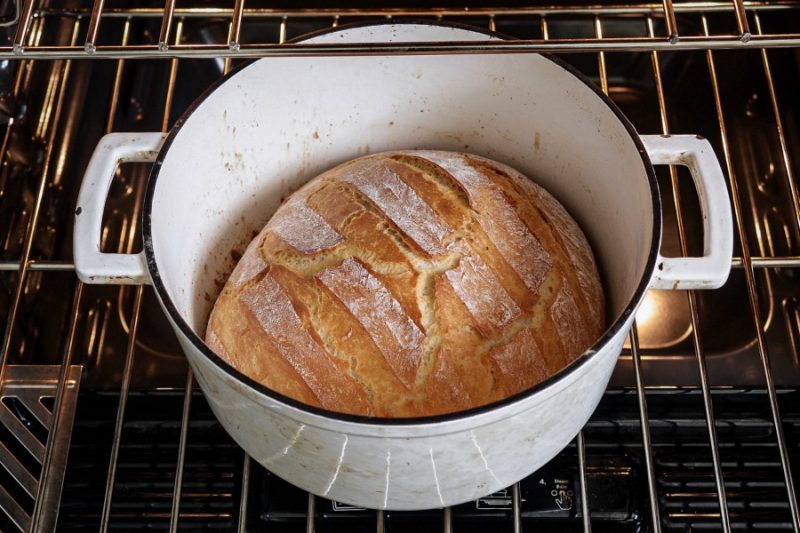
Cover the Dutch oven and place it in the preheated oven. Bake for 30 minutes, then remove the lid and bake for an additional 10-15 minutes until the crust turns golden brown. Use a knife to check if the bread is done by inserting it into the center of the loaf. If it comes out clean, your bread is ready.
Enjoying Your French Bread
Once the bread is baked to perfection, let it cool on a cutting board for at least 30 minutes before slicing. This ensures the interior is fully set and makes slicing easier.
Maintaining Your Dutch Oven and Tools
Keep your Dutch oven and other baking tools in top condition with a quality cookware cleaner and cutting board conditioner. Proper care ensures your equipment lasts a lifetime and performs optimally.
As an Amazon Associate, I earn from qualifying purchases.
Happy baking, and bon apptit!


